
This guide covers installing and connecting clickone on macOS 12 or later — about 3 minutes total. clickone ships as a web download, so macOS treats it as an app 'downloaded from the internet' and will ask you to approve it twice. That's Apple's standard Gatekeeper security, not a virus. Just follow the steps and enter your Mac login password when prompted.
Universal build — runs natively on both Apple Silicon (M1/M2/M3/M4) and Intel Macs. No need to pick a separate version.
- 1
Open the tutorial page and download the installer
Visit https://clickone.plus/tutorials (this page), click the 'Download for macOS (.dmg)' button above, and save the installer to your Mac (usually in Downloads).
- 2
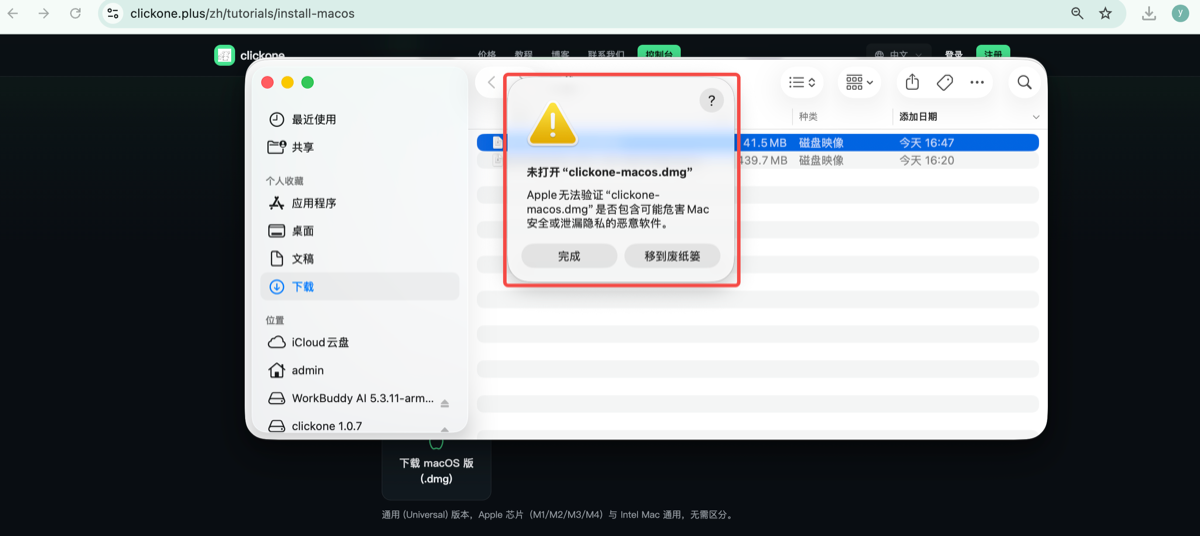
Double-click the installer and click Finish
Double-click the downloaded .dmg file. The disk image mounts and the installer window opens — click Finish to continue.
- 1
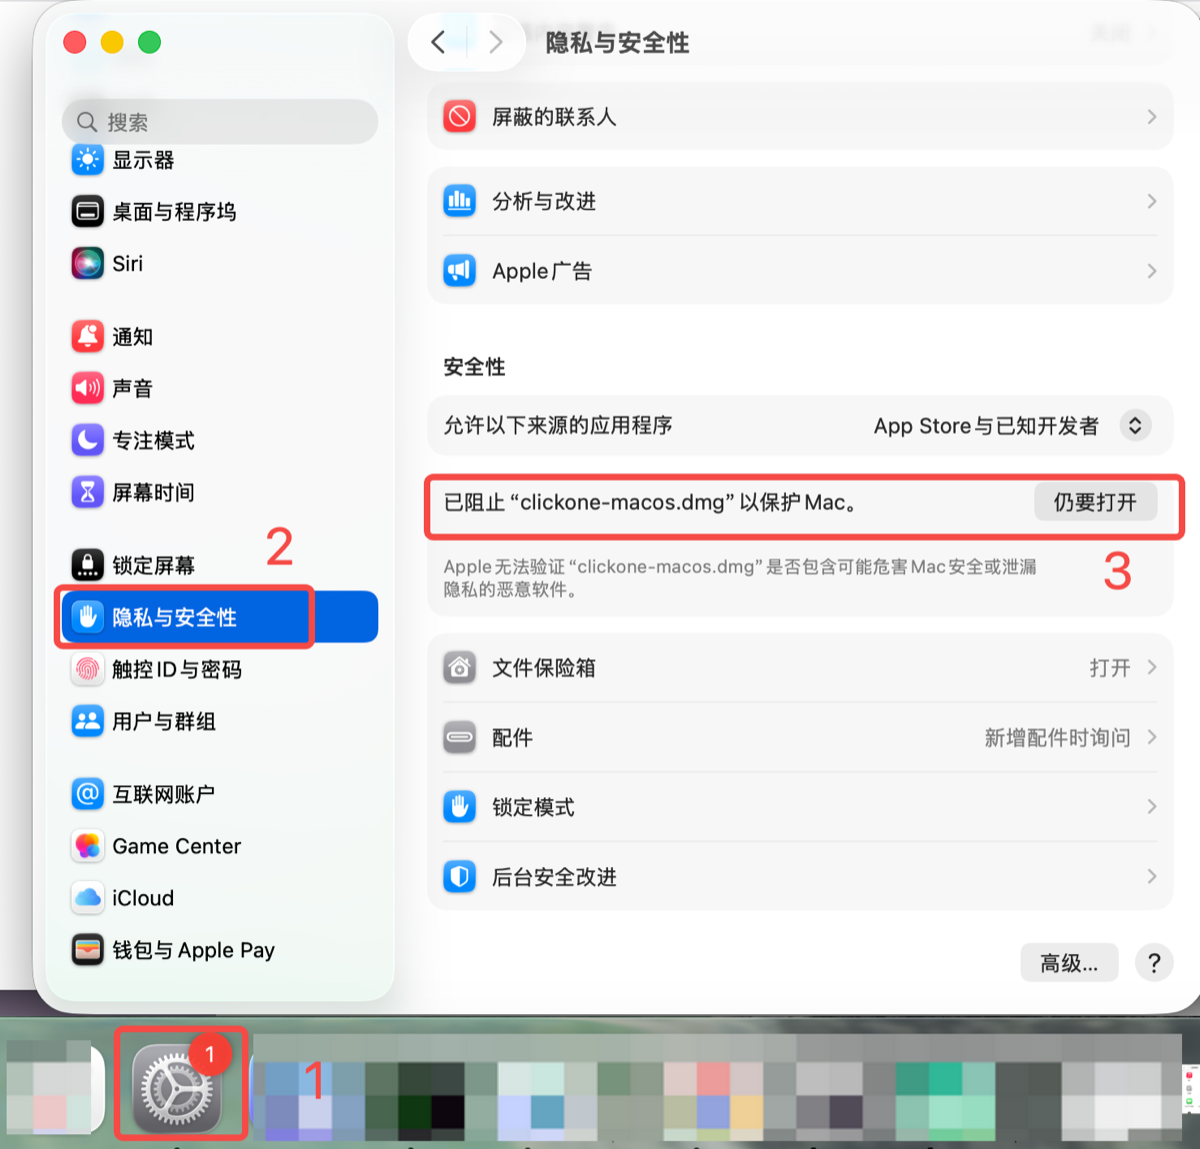
First approval: System Settings → Privacy & Security → Open Anyway
Open System Settings → Privacy & Security, scroll down to the Security section at the bottom, and click 'Open Anyway.' In the follow-up dialog, click 'Open Anyway' again and enter your Mac login password (or use Touch ID).
- 1
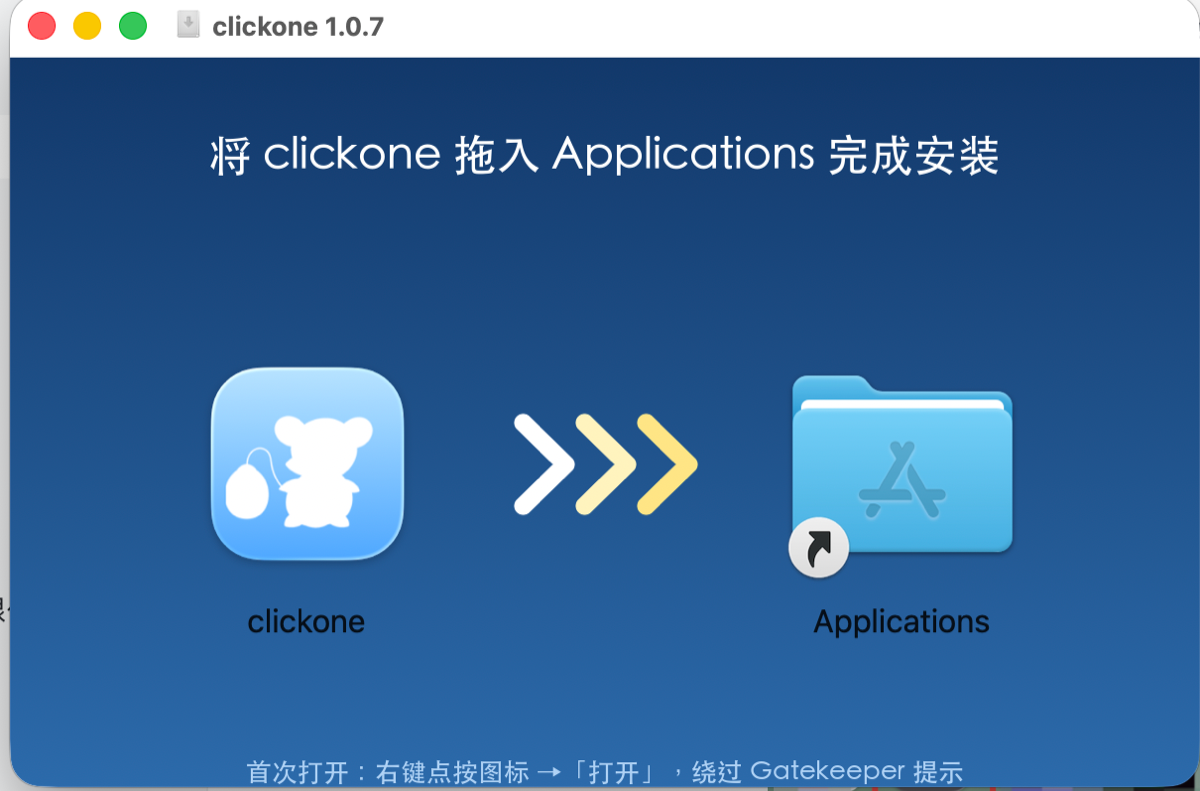
Drag the app into the Applications folder
In the installer window, drag the clickone icon onto the 'Applications' folder on the right and wait for the progress bar to finish. You can then eject and delete the .dmg.
- 2
Launch clickone from Applications
Open Launchpad or the Applications folder, find clickone, and double-click it. Because the app itself needs its own approval, macOS will block it again.
- 3
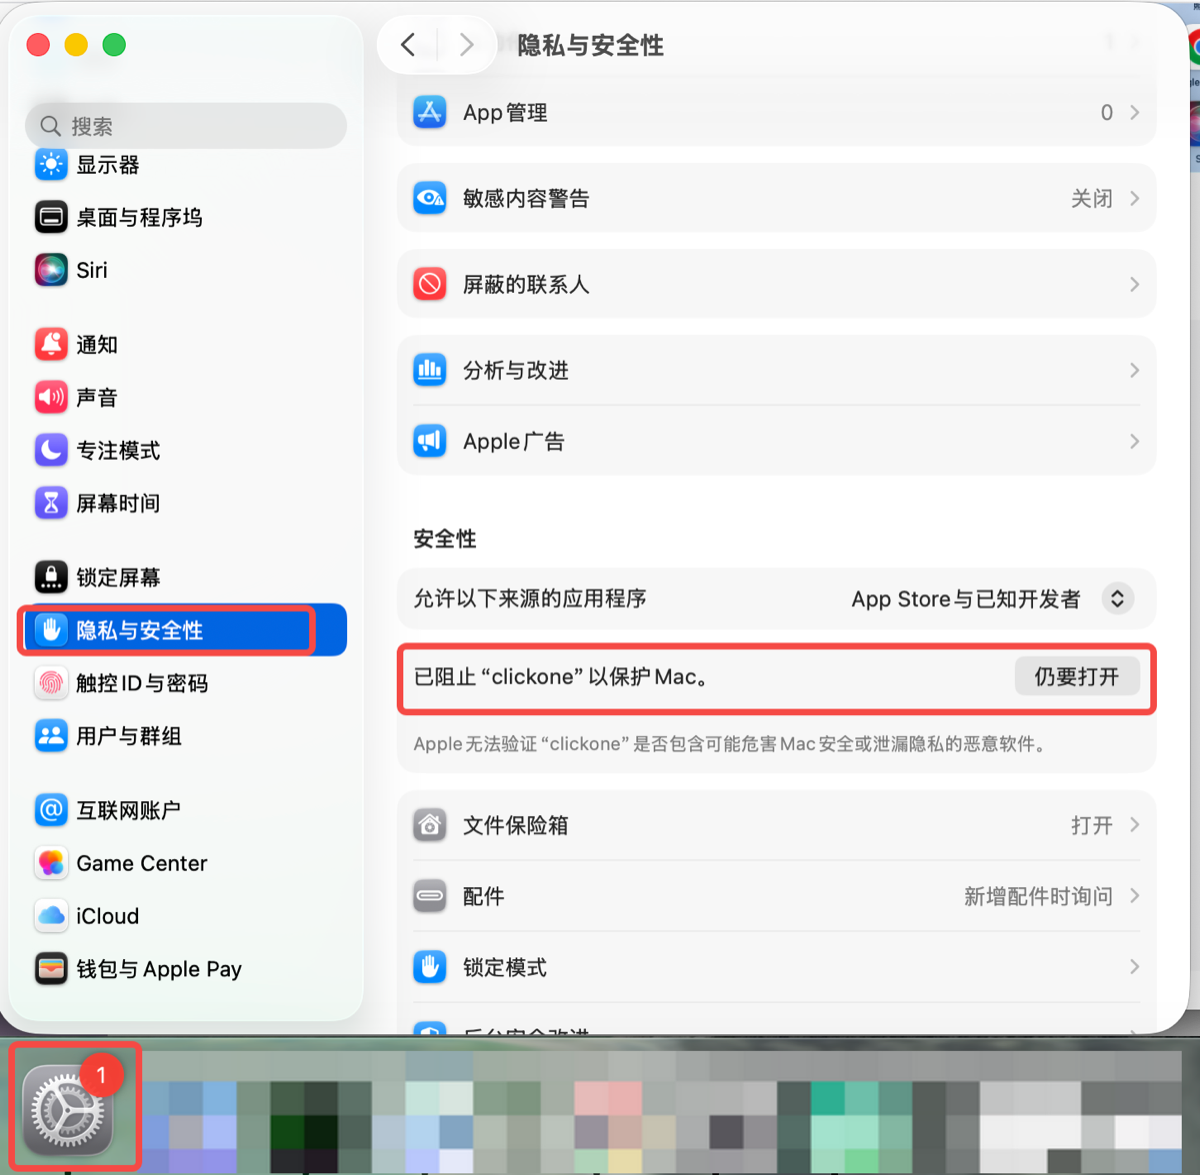
Second approval: Finish → Open Anyway → enter your password
Click Finish in the prompt, go back to System Settings → Privacy & Security, click 'Open Anyway' in the Security section again, and enter your Mac login password. The app then opens normally.
- 1
Sign in
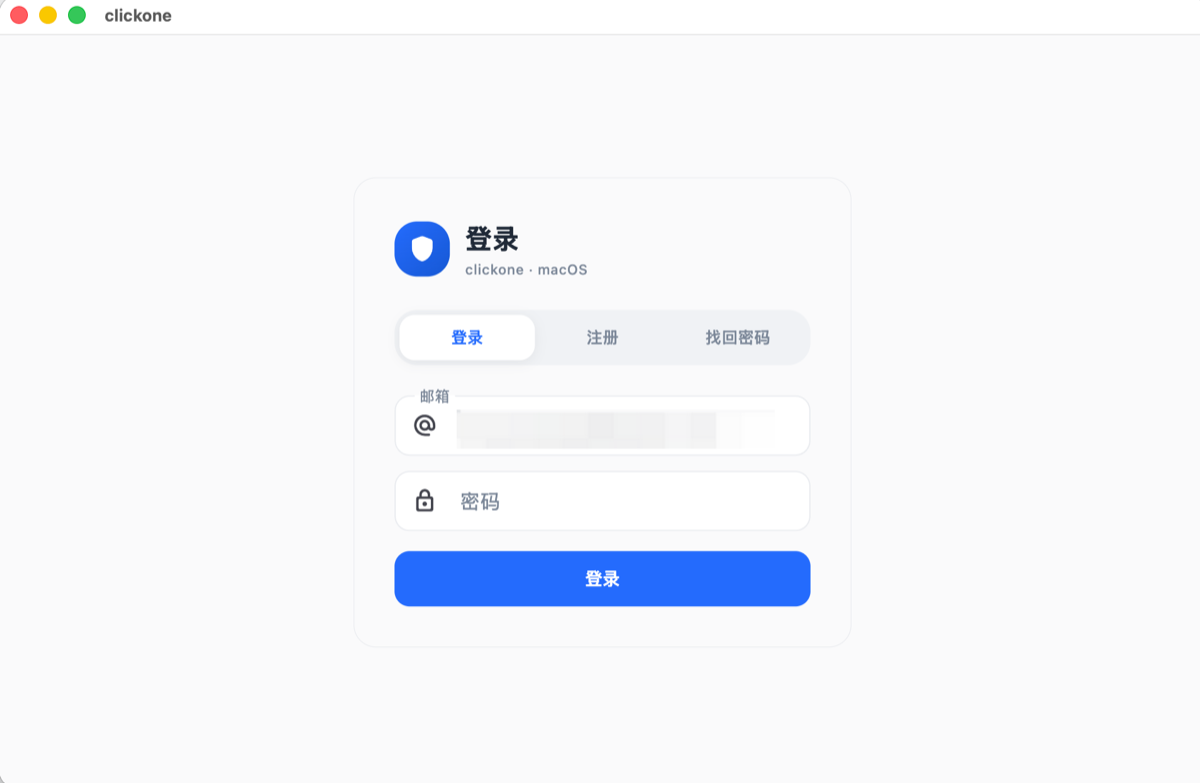
When the login/registration screen appears, enter your registered email and password (or create a new account first). Your subscription and balance sync automatically — no manual setup needed.
- 2
Connect and approve the VPN configuration
Click Quick Connect. The first time, macOS shows 'clickone would like to add VPN configurations' — click Allow and confirm with your Mac login password. When the status bar shows 'Connected,' you're online.
Why 'Open Anyway' appears twice
For apps downloaded from the web, macOS treats the installer and the app itself as separate programs and requires a separate approval for each the first time they run — hence the two 'Open Anyway' prompts. After you sign in, there's one more 'Add VPN configurations' authorization when you connect. All of this is Apple's standard security mechanism, not a virus or error. Every time, enter your Mac login password — not your Apple ID password.
Still can't connect?
If Quick Connect spins without connecting: ① check that clickone is allowed (and its network extension is enabled) under System Settings → Privacy & Security; ② try switching to a different node; ③ quit and relaunch clickone.