
This guide walks you through installing, signing in, and making your first connection with clickone on Windows 10 / 11 — about three minutes end to end.
For Windows 10 / 11 (64-bit). If the browser warns it's unsafe, that's the usual notice for an unsigned installer — choose Keep.
- 1
Download the installer
Click the 'Download for Windows' button above and save the .exe installer (usually to your Downloads folder).
- 2
Bypass the SmartScreen prompt (important)
Double-click the installer. If a blue 'Windows protected your PC' window appears, don't close it. Click 'More info' inside the window, then click the 'Run anyway' button that appears below. This is the standard block for an unsigned installer — it's not a virus.
- 3
Run the setup wizard
Click Next through the wizard to finish. We recommend ticking 'Create a desktop shortcut' for quick access later.
- 4
Sign in
Open clickone after installation and sign in with your registered email and password — your subscription and balance sync automatically, no manual setup needed.
- 5
One-click connect
Tap 'Quick Connect' to auto-select the fastest node, or pick a region from the node list. On first connect, Windows shows a 'Do you want to allow this app to make changes' or VPN / network permission prompt — click 'Yes / Allow.' Once it shows 'Connected,' you're online.
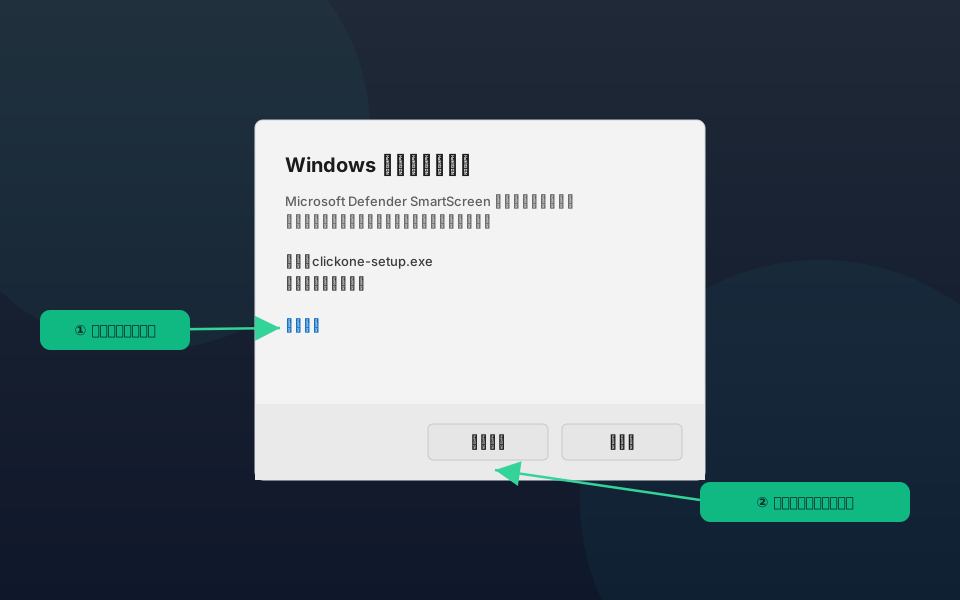
'Windows protected your PC' is normal
Our installer isn't commercially code-signed yet, so SmartScreen stops it the first time. Click 'More info' → 'Run anyway' — it's not malware. If your antivirus flags it, add the installer to its trusted list temporarily.
Can't find the installer?
Just click the download button at the top of this page to get the latest installer — no sign-in required. If the download doesn't start, try another browser or check your network.
A tip for a steadier connection
Enable 'Launch at startup' and 'Kill Switch' in settings — it's hands-off and prevents real-IP leaks if the connection ever drops.